Diy Ornament Crafts To Make With The Kids
Friday, December 1st, 2017
Keeping the kids busy and entertained during winter break is a daunting task for any parent. These fun and festive DIY ornaments are a great way to spend an afternoon (or several!) together, and they’ll love adding their creations to the tree. Gather up some supplies you probably already have around the house, put on some holiday tunes, and roll up your sleeves. Bonus points with homemade hot cocoa and marshmallows, recipe HERE.
Bottle cap snowmen
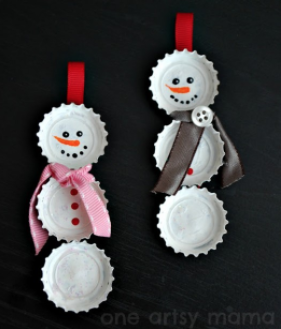
Photo and project credit: kidsomania
How cute are these little guys?
Materials:
Bottle caps
White, black, orange, and red acrylic paint
Paint brushes
Ribbon
Hot glue gun
Buttons
Scissors
Make it:
- Paint the inside of each bottle cap white. You may need a couple of coats.
- Glue three bottle caps to a piece of ribbon, one on top of the other.
- Form a loop at the top of the ribbon and secure with glue.
- Use the end of a paintbrush to paint the eyes, nose, mouth, and buttons.
- Tie ribbon or yarn between the top two caps to make the scarf and add an accent button.
Felt and twig trees
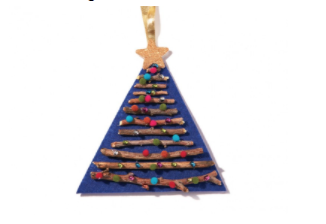
Photo: Erik Putz, Project: Today’s Parent
Make an afternoon of it: take the kiddos outside to explore and collect small branches, then come home to make these sweet little trees.
Materials:
Stiff colored felt
Tree branches
Glue
Pom poms
Beads
Craft stars
Make it:
- Cut out triangles from felt.
- Glue tree branches to felt.
- Decorate with pom poms, small beads or buttons, and a star.
- Glue ribbon loop to the back.
Colorful stars
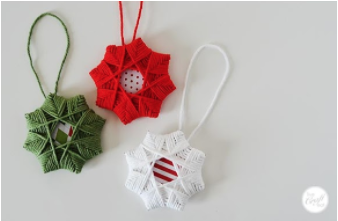
Photo and project credit: Live, Craft, Eat
The kiddos will love making these holiday stars. Let them choose the yarn colors!
Materials:
Corrugated cardboard (save your Amazon Prime boxes!)
Double-sided tape or glue
Yarn in one or more colors
Straight pins
Scraps of patterned paper or cardstock to complement yarn colors
Make it:
- Cut out two 2” x 2” cardboard squares.
- Tape or glue one cardboard square to the other to create a diamond shape.
- Cut out a piece of patterned paper or card stock in a square slightly smaller than the 2” x 2” cardboard piece.
- Stick one pin in each cardboard corner, eight total. Stick in pins about a third of the way, as you want to keep enough pin sticking out so you can wrap the yarn around it.
- Start by taping a yarn end piece to the back of the ornament. Take the yarn from behind the star, go over the top of one pin, go down two pins following the edge of the square, go around that pin, then come up behind the pin that is one pin up from where you just were. Loop the yarn over the top. Think 2 pins down, 1 pin up, 2 pins down, 1 pin up, 2 pins down, 1 pin up. If you need a visual, step-by-step photos can be found here.
- Repeat until the star resembles the photo above.
- Cut the yarn with a couple of inches to spare. Weave it through to the back of the ornament and tie a knot to secure.
- Push pins all the way into each corner to help keep the star’s shape.
Beachy vibes
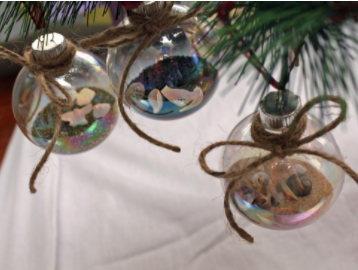
Photo and project credit: Turtles and Tails
Create a memento from a favorite family beach vacation and include collected shells and a little paper tag with the location and date.
Materials:
Clear glass ornaments
Sand or small decorative rock
Sea shells
Twine or ribbon
Make it:
- Add sand and shells.
- Secure top.
- Wrap twine or ribbon several times and tie off with a bow.
Craft stick snowman
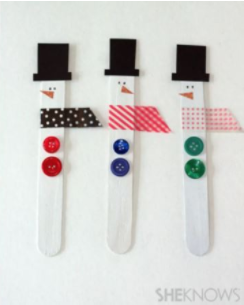
Photo and project credit: SheKnows
Materials:
One large wooden craft stick per snowman
Washi tape
White paint and brush
Orange paper
Black card stock
Fine-tipped pencil
Elmer’s glue pen
String or ribbon
Make it:
- Paint craft stick white.
- Make the scarf by folding a 4-inch piece of washi tape over the upper middle part of the stick and trim end diagonally.
- Glue two to three buttons under the scarf.
- Cut out a triangular shape from the orange paper for the nose, then a hat shape from the black paper. Glue both in place.
- Add the eyes using a pencil.
- Cut a piece of ribbon or string, create a loop, and glue it to the back of the snowman.
Holiday bunting
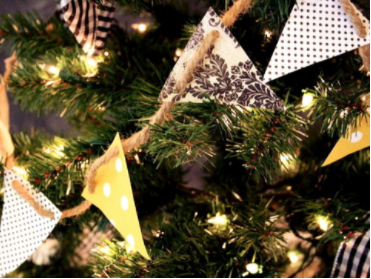
Photo and project credit: Jones Design Company
Make this Etsy darling for a fraction of the cost. Select paper to coordinate with your tree or let the kids run wild. Use twine for a more rustic look or ribbon for color.
Materials:
Holiday scrapbook paper
Twine or ribbon
Scissors
Hole punch
Make it:
- Cut uniform triangles from the scrapbook paper.
- Punch a hole on each side.
- Thread the twine through.
We’d love to see your DIY ornaments! Share them with us on our social media platforms!
